Present Your Photo Vision
You’ve got a pretty photo. Maybe a beautiful photo. You’ve taken the time and thought to take the shot, process the thing and share it with your world on the social site of your choice. But have you really presented your vision? Now, call me crazy (or don’t. I really won’t mind if you don’t.), but if you’re really trying to stand out from the madding crowd – folks really do appreciate a good presentation . Meaning, a clear representation of the thing that quickened your heart, made your eyes pop a little – and made you want to capture that awesome frame in the first place.
I mean, if you were standing up to speak to thousands of people about something meaningful, would you walk onstage in baggy sweats? Wait, maybe don’t answer that! I’ll feel so disillusioned if you answer “Yes”. sigh.
But when it comes to photography…
First: Good Composition & Processing
Composition is first, of course. Without a good comp, it’s hard to know WHAT you were thinking. But let’s assume that’s in the bag. Next is processing. TONS of options here. You could be going for total realism, utter romance, HDR, long exposure, black and white, or about a dozen other types of photography. No matter what, you’ll do yourself and your work a favor by thinking about what you’re REALLY trying to say… and taking your processing just that extra distance to ensure we, your doting audience, are getting the full impact of YOU and your point of view.
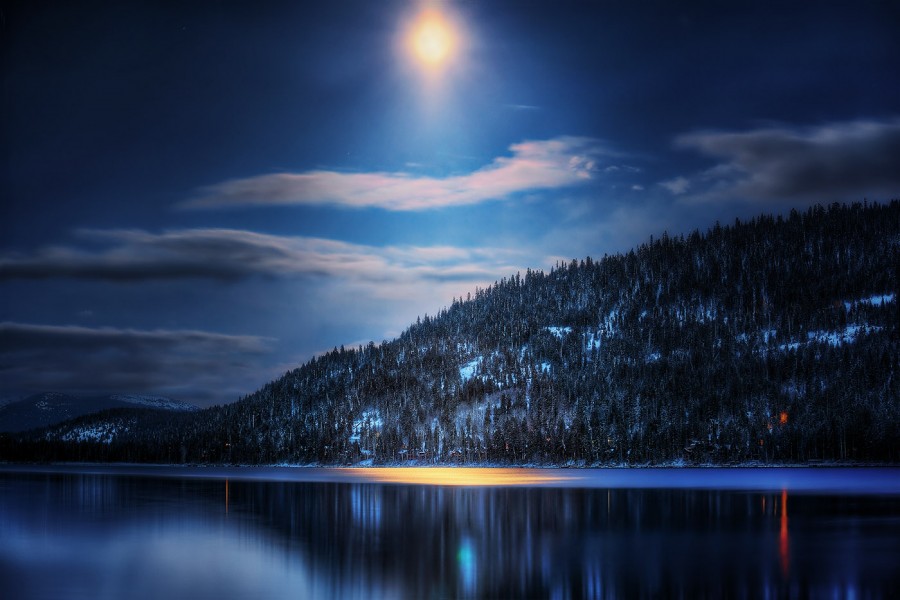
How do you do this? Well, in writing this just now, I realized I’ve probably just touched upon an entire book topic! But what I have is this image right here. Well, above here. I took it at around 1am on a fah-reeezing cold morning. It was probably single digits, Farenheit. True confession: I set up my tripod outside the car window (engine running), adjusted settings for the f/8, 400 ISO, 20 second exposure, rolled the window up and let the heater blast. Yeah, I roughed it. But I got the shot (and stayed warm), so was a happy camper.
In processing, I did some clean up, enhanced contrast and sharpening… and made sure light and tones were in good balance. It looked like this:
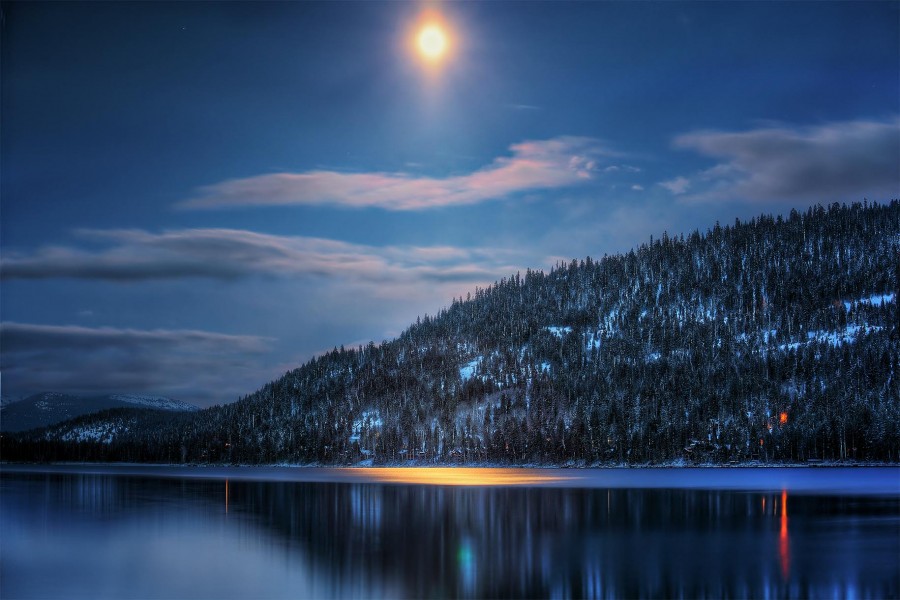
I liked it and could certainly roll with it at that point. But my true reason for taking the shot was that moonlight and the way it shone on the water. I love a good, evocative story.. and I saw one when I surveyed the scene. This version didn’t quite convey my vision – or the feeling I had when my imagination ran away with me and that light. I had to present it better.
The Extra Step: Go To The Light
So…
- I headed for Photoshop. Created an adjustment layer in black, chose a Soft Light blending mode.
- Grabbed the Gradient Tool, chose the Reflected Gradient and an Opacity of maybe 60-70%, created a Layer Mask, stretched the line out to the right and let go. This created a lighter, vertical column between the moon and reflection in the water.
- Then with the Brush Tool, I turned the Opacity down to about 10-15% and brushed just a little bit of the darkness out – so the column blended in better and didn’t look so, well, columnar. I mean, it’s one thing to elegantly make your point – and another to poke someone’s eye out with it. I prefer the former, myself.
For this photo and the story it wanted to tell… this final step became the way I chose to present my vision. I always do like playing with the light as my last step. I’ll direct it, shape it, make it draw the eye to where I feel like the goodies are. In this case… it was just all about the eerie, mystical light and reflection and the way my own imagination started weaving story threads from it. That version is the one at the beginning of this post.
My point? Simply that when you think you’re done… go back one more time and see if your photo is telling its story as well as it could. Even some subtle light change, a different crop, a little contrast pop, some selective blur or glow can go a loooooong way toward giving your image that final “ta-daaaa!” that’ll make it go over the top.