Shoot Better Forest Photos
Shhhh, not a word. The forest is thinking.
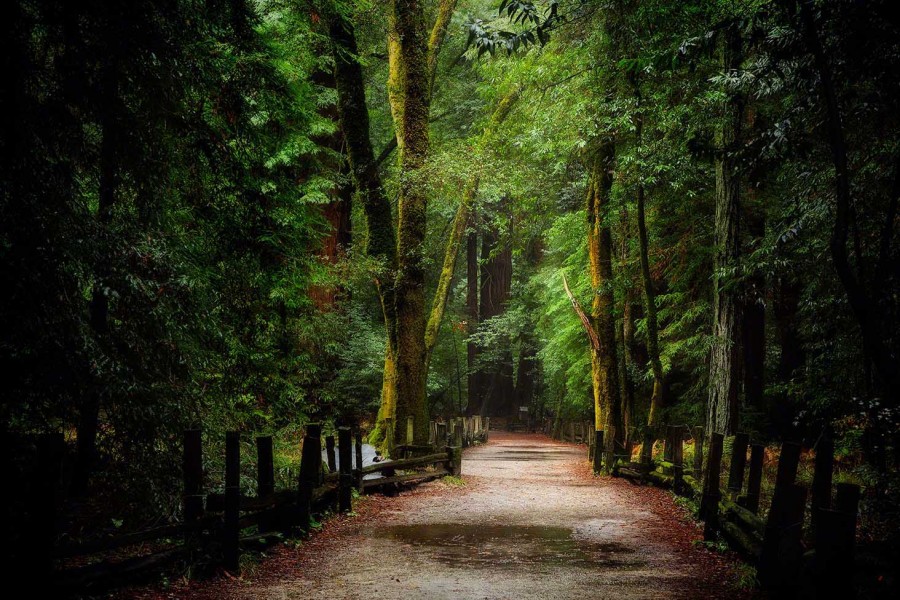
I love perspective, leading lines and journeys. I love light that changes and makes you feel like something special is happening. I love trees that think. Although, I’m quite sure it’s not the same as people thinking. Hence, I cannot resist a moment like this… much less one with shiny water!
So, what do you look for in a forest photo?
Forests have a bazillion trees. A photograph of said bazillion trees doesn’t say much, unless you have some features to give it shape and boundaries. A path, for instance, gives us direction. Suggests a journey, going somewhere. Breaks up bazillion tree monotony. We get to wonder where it leads, who walked there, how long its been there. Yep, paths are good for shaping up a forest photo.
Find trees with strong lines. A mess of branches just isn’t a great picture. But nice, strong trees with interesting and definitive architecture to them always fascinate. And looking for leading lines!
Then there’s filtered light. A godsend for foresty goodness! Filtered light can create shapes, define sections of forest, create shadows in strange places, make everything seem ghostly, pensive, distant, otherworldly. Again, a great story element in a forest. Mix a little dust with filtered light and you have a mysterious mist, just waiting for your take on it. Ditto wisps of fog in a forest.
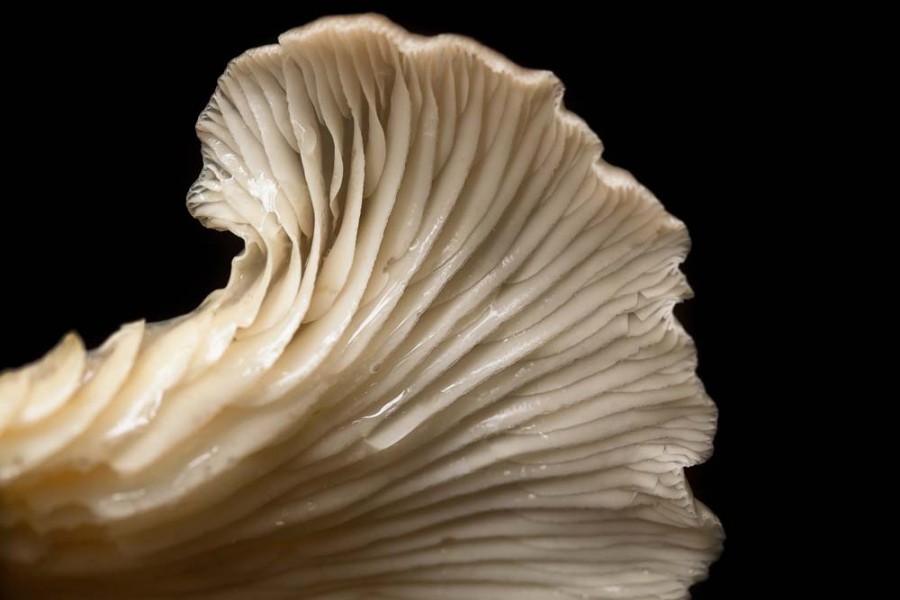
Rain. Wet is good! That’s when everything glistens, glows… colors deepen and richen. (not to mention all the people that DON’T venture out in such weather that would otherwise clutter your shot!) In some forests, wonderfully strange little mushrooms in all sorts of varieties only come out when it’s raining and if you don’t suit up and go looking, you’ll miss ’em all! I found this one on just such a day:
Processing that forest photograph
Processing-wise: Well, if you managed to capture any of all of the above, you’re off to a great start. Using this photo as an example, you can make everything except for the center darker with either a black adjustment layer or NIK’S Midnight filter. Then use the Gradient Tool in Photoshop, choose the Reflected Gradient and snap out the center at 60-70%. Now we’ve got some lighter-center focus, like we’re entering into a magical zone.
Sharpness... I used the High Pass filter in Photoshop CS6, but you could use whatever your favorite sharpening tool is to make sure the leaves have some snap. I do that right before I add some glow. That way my glow is just glowy – not blurry. In this case, a little OnOne Software Hollywood Glow. But just a smidge… only enough to make you want to peer a little closer.
Fine tuned with some Contrast (I love NIK’s Pro Contrast filter), even a little NIK Darken/lighten center filter or OnOne Software’s Center Spot Focus… and you have yourself a mystical, magical little forest shot.
Note: I shot this particular forest photo as a RAW, auto-bracketed set, thinking I’d make an HDR photo. But one of the middle exposures was so well balanced that it ended up being all I needed. Rainy days and balanced light are often found playing together in the forest.
Have fun out there!