The Limelight: Photo Process & Preset Link
SONY at the Ryman Auditorium
During my recent trip to Nashville, TN for Sony’s DI event, testing the new Sony mirrorless cameras… we visited the famed Ryman Auditorim. Home of the original Grand Old Opry. It’s got quite a history – and an unmistakable vibe when you walk in the door. I could’ve stayed there all day!
We were given super special access, which I’ll talk more about in a future blog post. But today I wanted to go through a process I did on one of the photos from there… and offer you a preset download of one of the filter sets I used. I got this idea from one of the comments on my Google+ page, where a fellow named Matt Kaiser asked if I’d made a preset out of the NIK Analog Efex Pro filter wards the end of my process – and if I’d be willing to offer it for download. I thought that would be fun… so you can find that at the end of this post, by clicking on the small version of this image. It’ll download straightaway.
But I decided to do a bit more here, since I did a number of things to this image beside Analog Efex Pro and didn’t want to lead anyone astray.
So, first of all, here’s the finished image, taken with the new Sony A7r, with the 28-70mm f/3.5-5.6 lens (which will be available only as part of the kit):

The Raw Image
And here’s where it started, as raw single image:

36 megapixels – WHOA!
This sucker is HUGE! At 36 megapixels, the dimensions are 7364 x 4931, 350 ppi. If you shoot alot of auto-bracketed HDR, that’s some major real estate! When I enter that arena, it’ll be an exercise to consider deeply whether to shoot an image auto-bracketed… and a discipline to delete the ones I know I’ll never use much, much sooner! Plus my backup systems will definitely grow more quickly!
Bye-Bye Guy
But back to the photo. I didn’t mind there being a few people in the shot, but that guy on the lower left dominated in ways I wasn’t fond of. So I did a combination of copy-pasting sections of the surrounding areas and clone stamping to remove him:
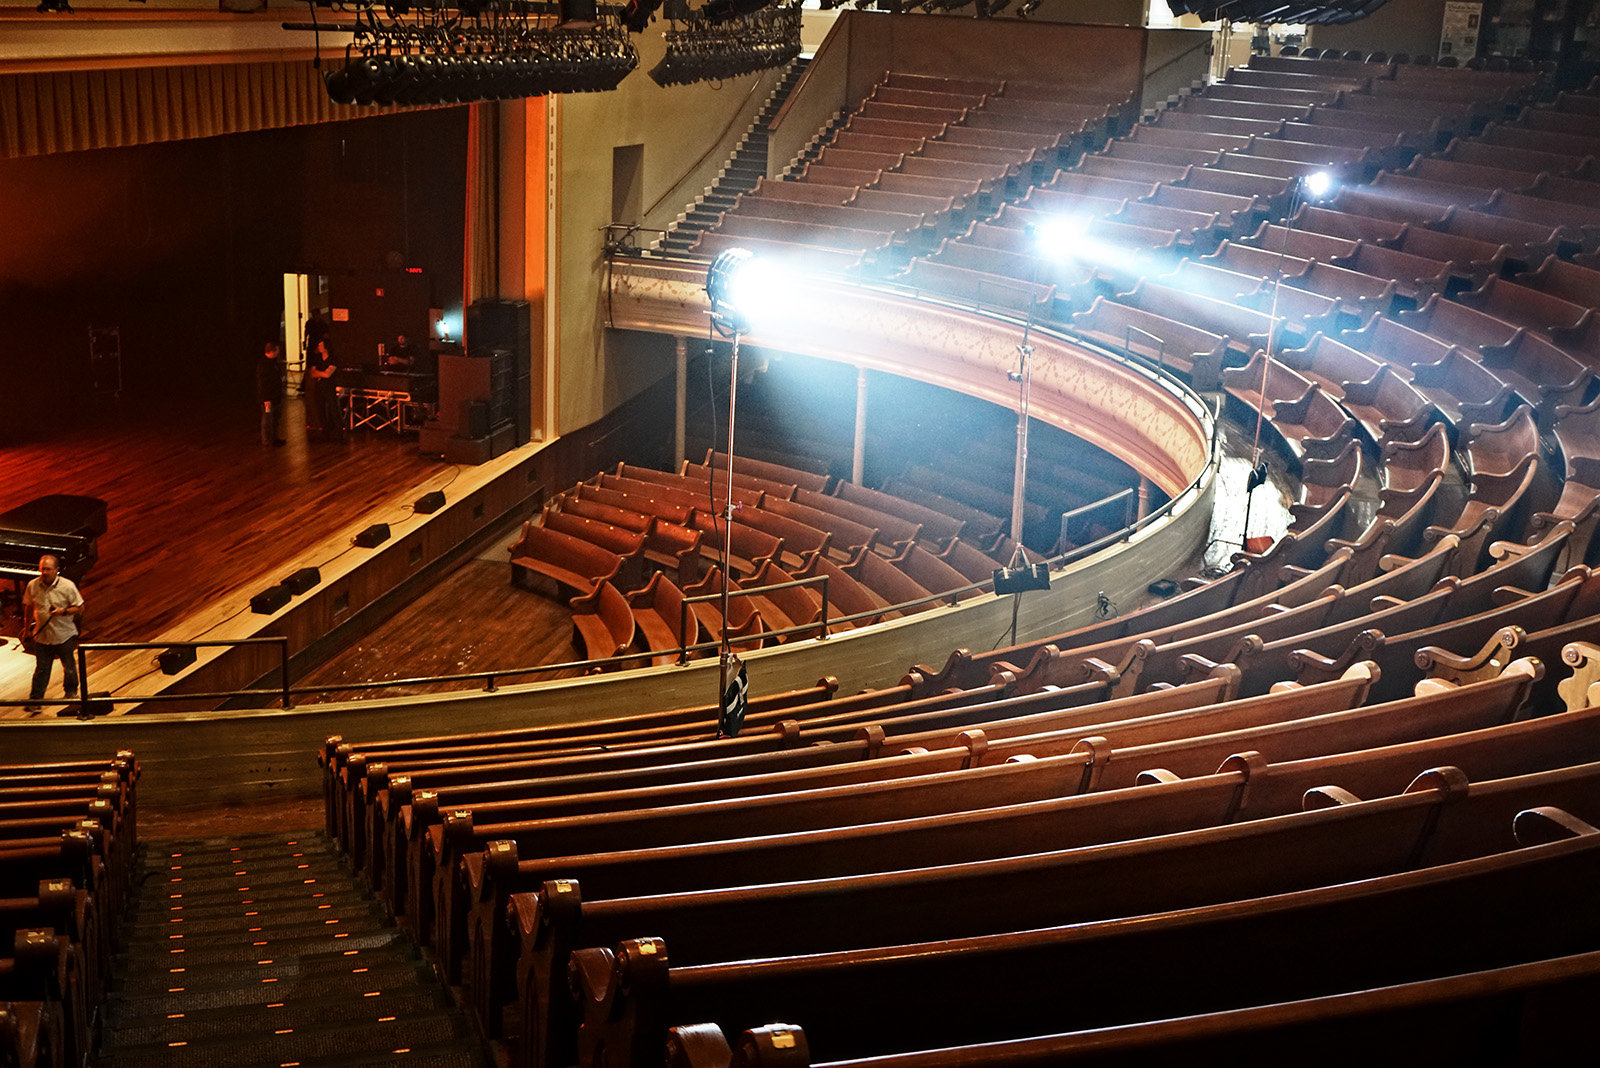
In this version, I also had applied an effect that ultimately I tossed… but it was the only one I had to show just the simple version of the photo minus the guy. I usually save each layer… but with files this big, it got so unwieldy I merged layers as I went along. I know I could’ve made a couple of files out this, but it wasn’t quite worth giving up the hard drive space for. I liked the image, but it isn’t really a museum piece. Just sayin’.
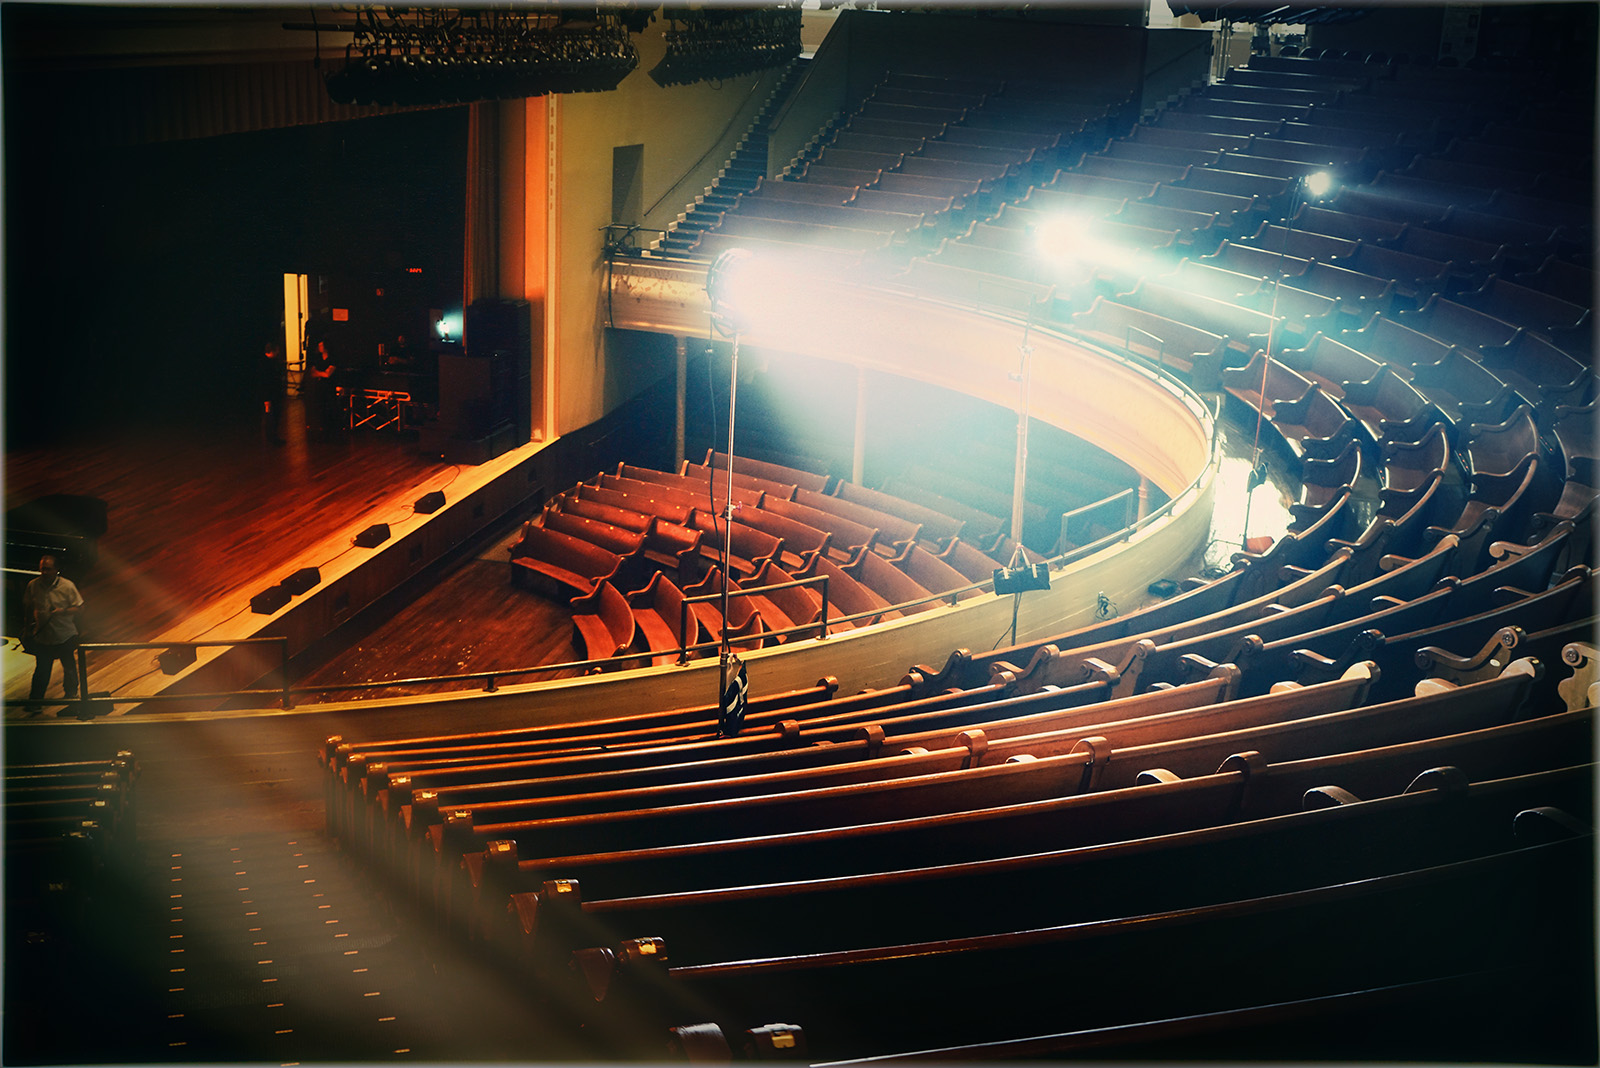
Getting Theatrical
Next, I wanted it to have a more theatrical feeling, and tone down some of the unrelenting warm tones. I thought some complementary blue or blue-green would do the trick, and used Magic Bullet Looks’ Blockbuster effect to get here:

Magic Bullet Looks x 2
That was a little bit much, but I liked elements of it. I also liked Magic Bullet’s Color Reversal Old Style effect, which you see applied here:

ALWAYS Blend!
Since I liked parts of both, I blended them in Photoshop using a Layer Mask so I had what felt like a good balance between the darkened theatre drama, the blue-green, the warm:

NIK’s New Analog Efex Pro
I really, really liked this one as a more realistic version.
But I got curious to try the new NIK Analog Efex Pro filter, which as of this writing is brand new. It was released while I was in Nashville, so this was the first chance I’d had to try it out. I found a combination that took a photo I liked really well into a whole new direction – which I also really, really liked! It made for a more artistic/filmic/vintage vibe:

I liked the extra ray of light on the left… and the way it made the air look dusty or misty, the way old theaters do. In fact, this theatre had that misty thing going on when we first got there, but it had dissipated some by the time I took this shot.
The recipe for this effect is what you can download at the end of this post. Just click on the smaller photo and the .zip file will download automatically.
More Pop, Please!
BUT… I wanted a little more POP. I liked the muted vibe, but at the moment I was processing this – was craving a wee bit more contrasted Oomph.
So I did one last step: onOne Software Perfect Effects Center Spot Focus, which got us the finished image:
Free Download:
Just click this photo to download the free “recipe” (Preset) of the Analog Efex Pro filter set I used on this image:
![]()
SIGN UP
Sign up over on the right for notifications of new blog posts!