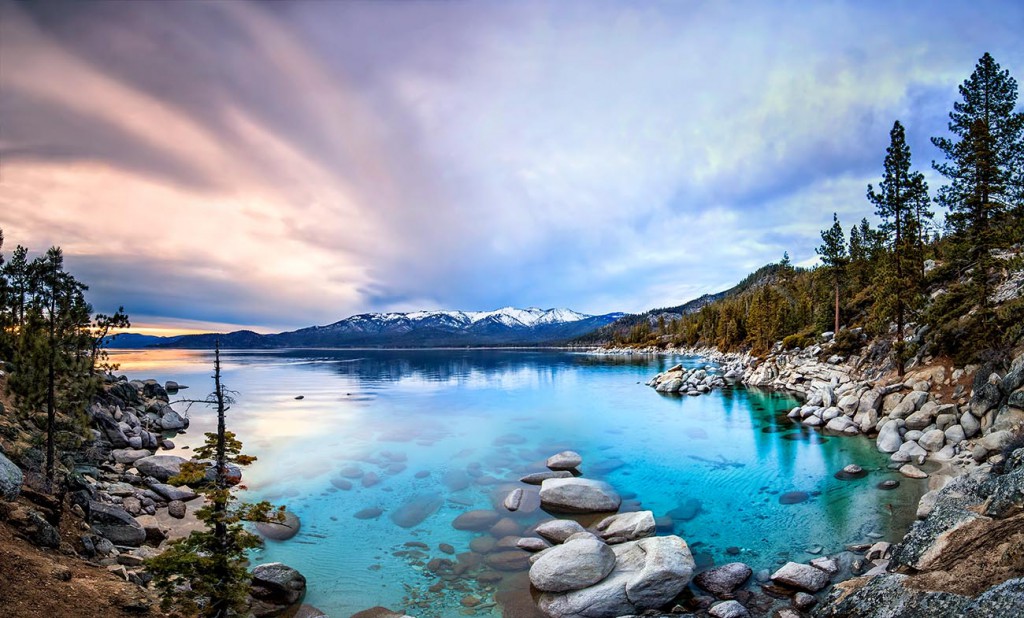
The Age of Panoramas
It’s So Simple On a Mobile Phone Nowadays
Panoramas photos are becoming all the rage now. On many mobile devices, you just hold up the phone and follow its direction to create them. They’re getting better all the time! However, at 72 ppi – it’ll look great on your computer monitor – but you won’t be printing a big one for your entryway anytime soon. For a mondo printable panorama, you really need to use a big-girl/boy camera.
A Little Trickier With a DSLR
With a DSLR, it’s not quite as simple as with your camera phone. You have to take impeccably framed multiple image, then “stitch” them together later in Photoshop using Photo Merge (or some software that specializes in panoramas), then clean up any aberrations, balance any lighting variations – and process the photo (if you so choose). It’s quite a process! You’re talking hours. Many photographers do them with 10, 20 or even more images – some of those guys are at it for days. I tried doing couple of panoramas a few years back… they didn’t turn out well at all. They actually stunk quite badly. But this day I was in the mood to give it a shot. Well, four shots. That was about all I was willing to commit to, just in case it blew. Keep it simple!
I’m not unhappy with this! In my world, that means “hey, not bad!”
First: Get the Shot(s)
You have to use a tripod for panoramas; the variables even WITH a tripod are so great it’s not funny… and doing them hand-held is just inviting a train wreck.
I used my 14mm lens on vertical orientation, since the bottom-to-top area that I wanted to cover was greater than landscape mode encompassed. With each shot, I overlapped the previous one by about a third. You can actually buy equipment that makes this part super scientifically calculated and perfect: I had my Really Right Stuff TVC-23 tripod/BH-55 ballhead combo with me, so that’s what I used.
Truth be told, I had visions of doing this as an HDR image… meaning, I thought I might process each one of those four shots as an HDR image, then stitch them… then balance and process the entire image as a whole. In the end, I nixed that idea even though I made the auto-bracketed exposures. The mid-range RAW images looked quite fine by themselves. Besides, I just didn’t want to go to ALL that trouble on what was intended to be a test run!
Stitch & Process
Luckily, I didn’t need to do any lighting fixes… when they all came together, it looked right. Meaning: one frame wasn’t dark next to its mate. That can happen.
I did ultimately have to choose “Correct Geometric Distortion” in Photo Merge (I use Photoshop CC), since the first one looked more like some exotic horn of Cornucopia… but considering I’m a total panorama agnostic, but all in all I was pleased with how it came together! The key is in taking super solid images in the first place; carefully set up with little or no variations in framing and level, good exposure, etc; that minimizes how much “fixin’ you have to do later on in Photoshop.
Even then… you have to pull that image in to 100% and go over it with a fine tooth comb, to make sure all the little glitches in the stitching are cleaned up. Mine wasn’t too bad… but there were maybe 4 or 5 places where the stitches weren’t perfect and I had to either clone stamp, use content aware fill… and in one case, copy a section from one of the RAW images to fill in where a spot in the water just didn’t turn out right.
THEN I processed it. Contrast, vibrancy, sharpening, a little color enhancement in the sky. I stuck with a more realistic look on this one.
NOTE: There are ALOT of folks out there with how-to’s on panorama shooting. Believe me, I’m no expert. In fact, I wanted some basic direction before I started, just to make sure I remembered how to do one – and that there weren’t any new tricks I needed to be aware of. I used Darren Rowse’s simple tutorial , which was all I needed for this round.
In The End..
Will I be making more panoramas? Not sure. I’m not SO in love with the process that it makes me jump for joy at the thought of making more. On the other hand, if a situation arose that just screamed for it – I feel confident now that I could do a decent job.
I think it’s always a good idea to try something new – even stuff you’re not wild about doing. Because 1. it makes you a better, more skilled artist.. and 2. You never know when you might need that EXACT skill to produce the piece of your dreams!
Or… you can think of it as research into what all the cool kids are raving about. hehheh.
I’ll tell you one thing… the tools for Panorama images have sure gotten better, because it was WAY easier to get good results with Photo Merge than it was 4 years ago. For that, I’m eternally grateful. ;D
