Anatomy of a Photography Show, Part 3 – The Selections
3rd installment in a 4-part series of “Living Your Dreams… Lessons Shared”, featuring much of what I learned and experienced whilst putting on my first photography show in Truckee, California…
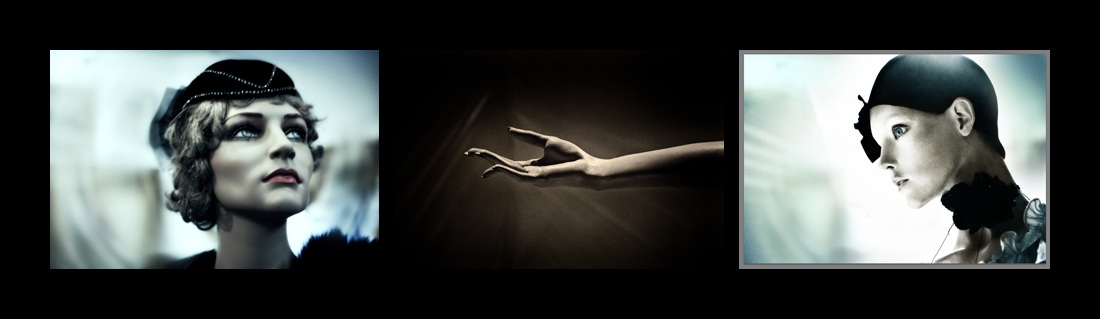
Photo Selections… The Mannequins
So, in yesterday’s post I mentioned that the owner of Coffeebar had some pretty clear ideas about this photo show of mine. He didn’t want to have final say about ALL of the images… but did point to a few in particular that he liked. There were the mannequins… which I’d taken some years ago, just a bit of whimsy that amused me:
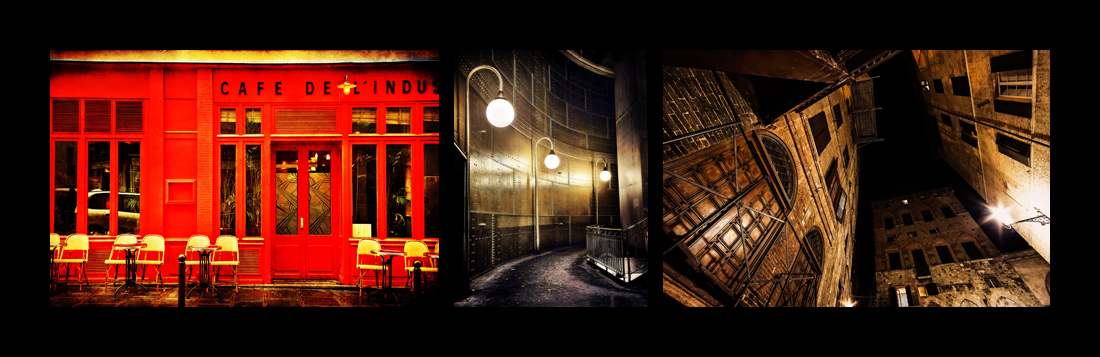
Italy, Paris:
Greg pointed to some of my images from Europe… he liked the faraway, urban feel… and the quirky feel.
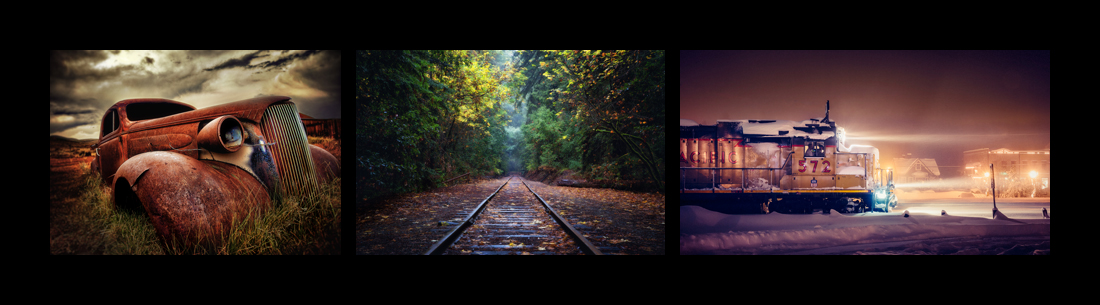
Landscapes That Tell a Story
He said “OK!” to landscapes that were not from around Tahoe… so I included some of my personal faves that were quirky, interesting and told a story: (I snuck the one of the train into the mix, even though it was taken in Truckee. It had such a strong story element that it fit the Prime Directive. People are loving it!)
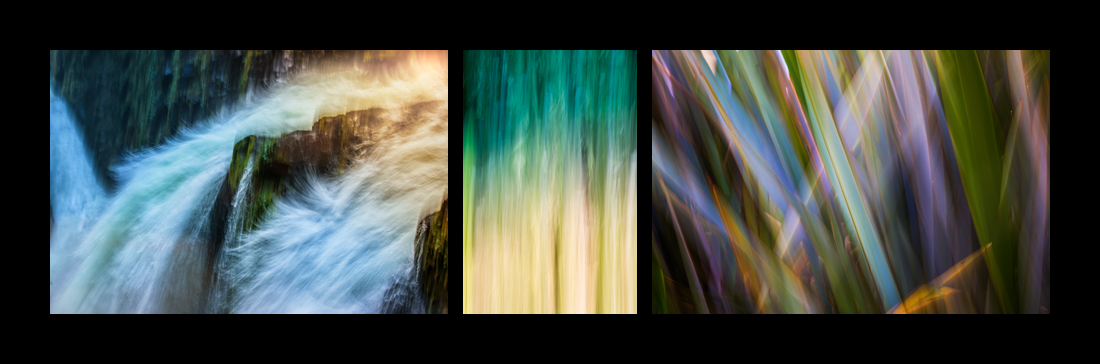
The Spa Collection
Finally, I included 3 abstracts from a project I’m working on… my print lab dubbed this particular group “The Spa Collection”. I figured they’d work well with the railroad tracks image in this one particular corner of Coffeebar to create a super relaxing vibe. The Spa Corner! hehheh. The motion effects are all done in-camera… colors beautified in post-processing. 😉
Lesson: Choose pieces that speak to your audience’s culture and that play nicely together.
Choosing A Print Lab
First of all, when you do a show like this – YOU are paying the bill! So you want to be really smart about how many pieces you have done – and what materials you use.
I chose DaVinci Digitale in Laguna Hills, California for a few key reasons.
My photography website is built by SmugMug, whom I absolutely love! When someone wants to purchase a print, they can do it in minutes and the prints are awesome.But for this show, I wanted to use different materials than are available there… plus I wanted to work personally with my print lab to create these pieces. Finally, I wanted to find a lab I could develop a relationship with over time for the really big prints I know I’ll need to produce eventually. I wouldn’t have the courage to pursue this crazy dream of mine without knowing I had someone watching my back: that could help me navigate the tricky waters of this new territory. DaVinci Digitale is that partner for me.
They are also Concept Framing International and do the most incredible framing work you’ve ever seen! Most recently, they printed and framed photographer Jeff Mitchum’s photographic art piece that sold for $1.8 million. I’m not sure if it’s uncouth to mention such things, but my point in doing so is to say that this is a lab that REALLY knows their stuff… AND were still willing to help me through my virgin voyage into this new world with all the care and kindness you can imagine. (if you recall, I have this vision in my mind for a fantastic gallery show – somewhere. I don’t know where this gallery in my vision is, only the impact that it has on people. You need a trusted team to create such a thing: the DaVinci crew is part of mine!). DaVinci/Concept Framing will print or frame on just about anything… that is their true art… and they are second to none.
So I wanted awesome work, people who knew WAY more than me, were willing to hold my hand this first time – and who have a great sense of humor and humanity. SCORE!
Many people had told me not to do a show like this. “You’ll lose your shirt!” they’d say.
I told DaVinci this as well. They said: Well, don’t do too many pieces and use less expensive materials that work well for each image.” Then they proceeded to help me do just that. We stuck with PETG on Sentra Board (which, while less expensive, creates a very high end look), brushed aluminum (cheaper than metal and so effective!) and canvas.
PETG gave The Spa Collection an incredibly high end look and feel at a VERY reasonable price point. The material itself added to the feeling and tone of the images to give them pop – and still maintain a soothing vibe. I’d never even heard of it!
Brushed aluminum gave the European and mannequin photos just the right amount of texture and sheen – not too much, just enough to add to the character of each image. It’s cheaper than metal, less commonly used – with a very unique finish.
Canvas was perfect to show off the depth of textures and tones in the shot from Siena; the one looking up at the buildings at night. A great, lower price point choice.
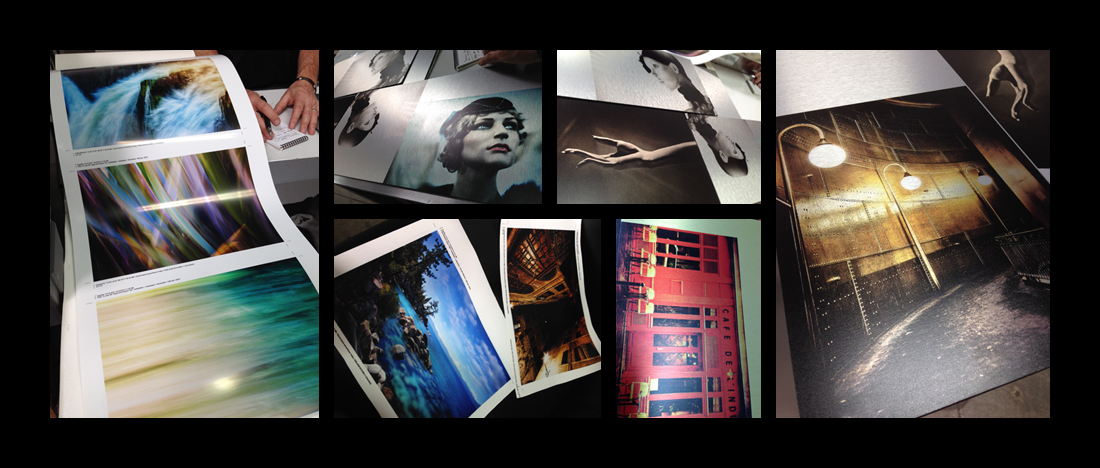
I went to DaVinci to color proof, too. This is important! Files don’t look the same on every computer… there are a few ways to minimize the differences. The most effective: stand there with your print team and decide on the colors with them! Here are some of the proofs from the day I did just that:
NOTE… the PETG prints on the left were only proofs: the final ones have the coating added, which, when added – gives those photos real va-VOOM!
The train tracks, car and train had all been previously printed on metal by Google for a photo event back in November. They are absolutely gorgeous – and I thought they filled out the show beautifully. They are real show-stoppers! And I have to say… the PETG prints right next to the giant metal one (from Imagewizards) represent very different cost-of-materials… and yet look right in the same ballpark visually.
Lesson: Work with a print lab that understands their materials and art SO WELL that they can easily put together a package that keeps costs where they need to be – yet shows off your work to its fullest potential. Printing and framing is every bit the art form that your photography is. So, look for folks who think outside the box and who have a great attitude. Patience, humor, care, artistry are huge bonuses!
Plan to Charge Sales Tax
I’m not sure how it works in every state or part of the world, but here in California – the State Franchise Tax Board wants their cut of everything you sell. And to legally sell stuff, you have to have a Seller’s Permit and collect taxes on every item sold. It’s free, which is good. Having one also enables you to purchase, say, prints for your first photography show at wholesale prices. 😀
You also have to be sure to SAVE the money you charge for taxes – so you have it when it comes time to ante up to the government. Details!
Having always had service-based careers, this whole process was new to me. I went on the California State Board of Equalization website, applied for and got a Temporary Seller’s Permit, which lasts 3 months. I figured that was a good way to start, since if I don’t like doing this whole thing I can be done with it. And if I do like it – then I just apply for a permanent permit and away I go. Just a little legal reality check for y’all who might be new, like me!
Oh – and you can use the Square Card Reader or the PayPal Here Credit Card Reader if you’re handling your own sales at an event. I got both – and just need to study up on which will work better for me. I’ve had a PayPal merchant account for years… but everyone raves about Square. On my list: compare features and interest rates!
Lesson: Before running out and selling your prints… make sure what legalities and tax laws you have to abide by. Check your state’s website for what to charge, what permits might be necessary, how to report… and make sure to SAVE the tax money you collect, so you can pay up at the end of the year!
Next time:
Images, print lab, materials… check. What’s next? Oh, how about installing, the bio piece, arrangement, titles, extras, the Big Party? That’s what I’ll cover in my next installment!