Translating Vision to Final Image
A Vision from Siena
I always love looking at before/after comparisons. I’ve noticed I’m not the only one!
So today, I thought I’d share a fun photo that I had an idea about when I shot it; but had to complete it in post processing.
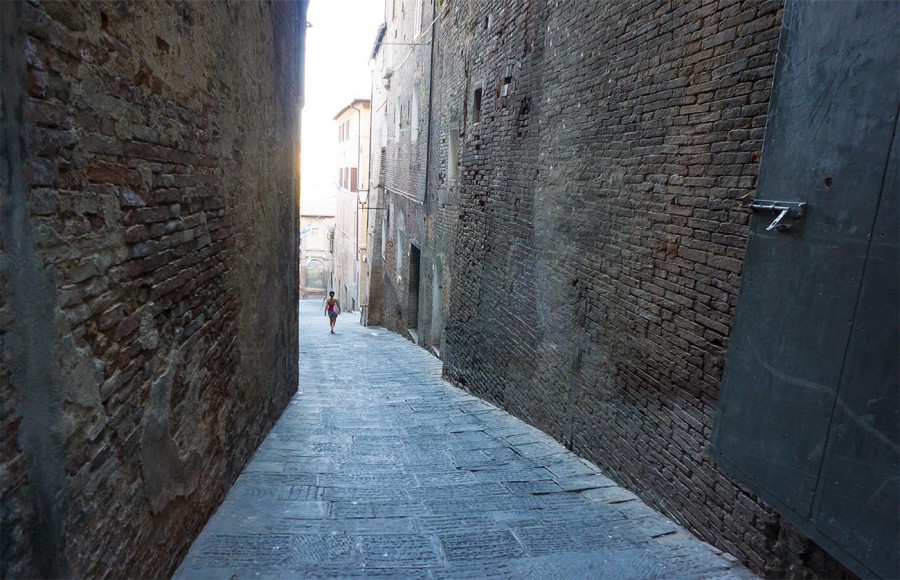
This photo is re-imagined from a single-frame RAW image, which I shot with my NEX-7 whilst in Italy, August 2012:
Composition From the Hip (and Gut)
We were running around Siena for the very first time. I had my Canon 5DIII on a tripod, set up for bracketed shots – my Sony in the other hand, grabbing POV images as we moved about. I love the freedom of having both, because I see different things with each set up. On this day, we had limited time and were trying to see as much as we could. So I just set my NEX on Auto and got what I got. Y’know, snapshooter style! I find that so freeing and fun. It reminds me of when I first fell in love with photography, just seeing the world in new ways, capturing it all as quickly as I saw it. It’s fun to not have to set up… but just shoot one-handed, from the hip – and gut.
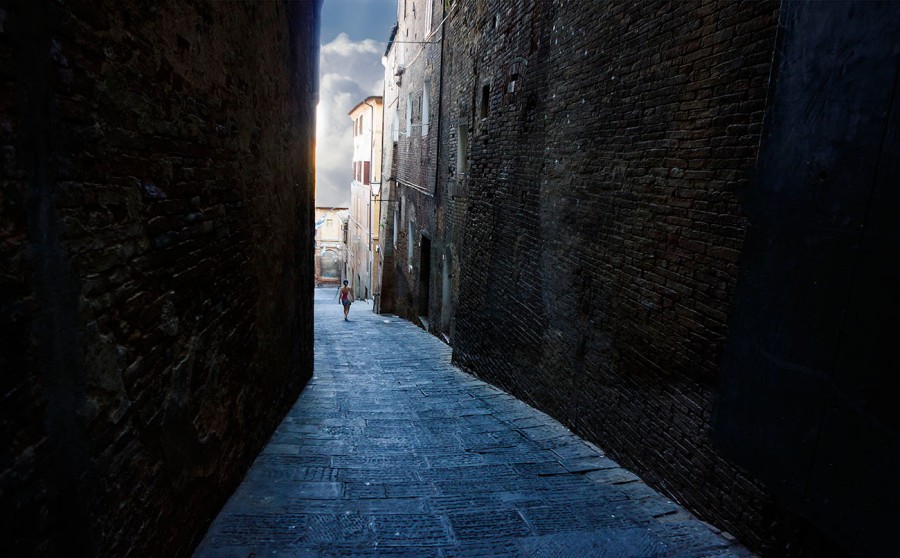
I love roads, paths and diminishing lines. I love shapely perspectives. And to find ONE person in the middle of all that was a gift from the gods! So I snapped this image, just a single, one-handed frame shot as we zipped by:
The Metaphor
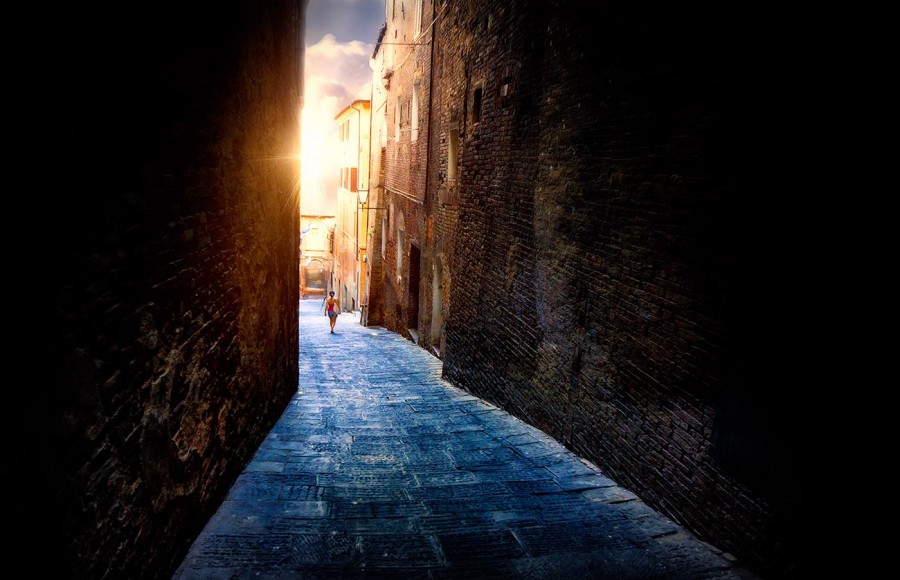
I loved all the textures and the juxtaposition of the ancient brick walls and the modern, colorful lady with her fashionable oversized bag over her shoulder strolling down between them. Loved that she was walking into the light… and that you could see the pop of the sun coloring the edge of the wall. That just opened up a WHOLE set of possibilities! The center was kind of blown out – but I shot the photo in RAW format, so figured I could pull most of the details back in. I was right! But I added a bit too.
The thing I’m not crazy about with the NEX-7 is the amount of noise present in most every photo. But here, there was simply SO much texture going on, I figured I could work it to my advantage. I decided not to get hung up on that for this piece.
Metaphorically, I saw this as a journey from old and dark into undiscovered possibility and light. This tends to be a recurring theme in my life – and it shows up in my photos a lot! The original image was very flat in color – which is normal for RAW – and never phases me in the least.
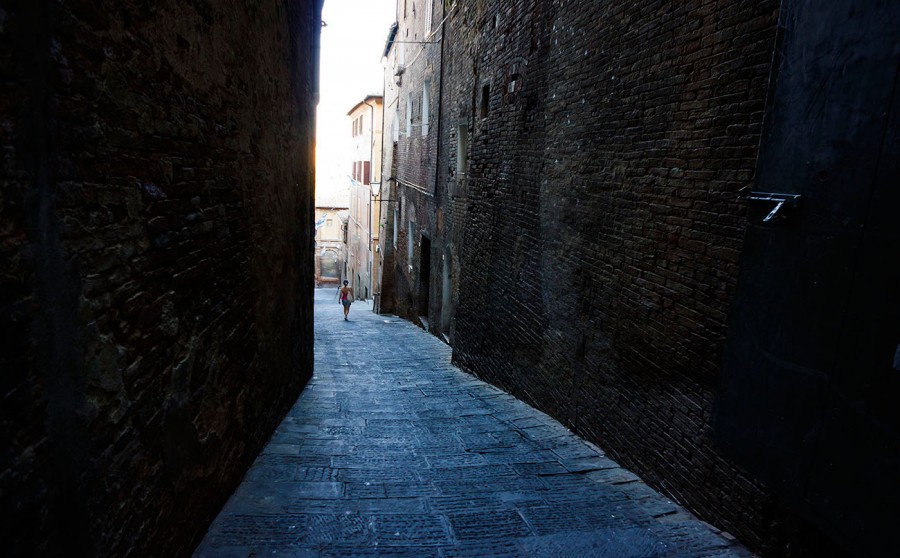
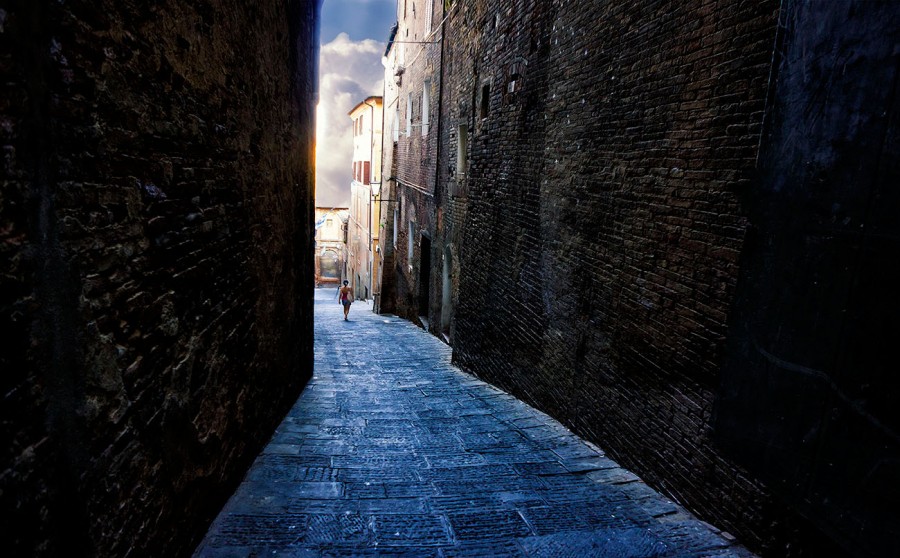
I knew I wanted to deepen and intensify the whole thing. Add some mystery. So in Photoshop, I added a Black adjustment layer in the Soft Light blending mode… then brushed the girl back in to keep her as the brightest point. I paid attention throughout this process to be sure that the pop of red from her blouse stayed prominent:
The Sky
Next, I used OnOne Software’s Basic Brushes to add some of the detail and highlights back to the buildings in the center and make it all cleaner and more visible.
Then… the sky. My classical photography background used to battle with my artistic creation training and over the whole notion of adding a different sky to images. While I always seek great skies for my photographs… if the composition is strong, the moment is unique, the story is good, but the weather is uncooperative… well hell, I’m not going to toss 90% good for 10% meh! I’m over that argument. I’m not a reporter or journalistic shooter, so I’ll swap skies in a heartbeat now. Which I did here:
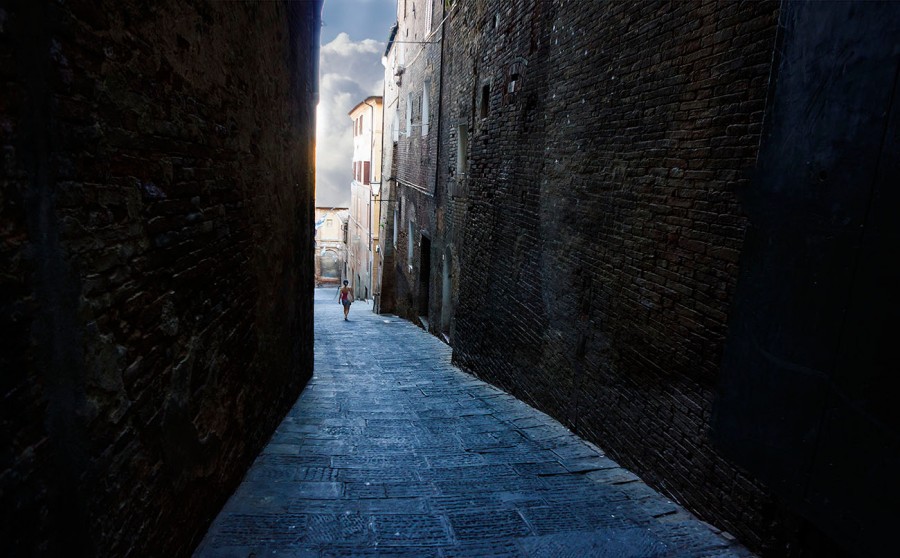
Matching the Sky
I’ve catalogued a ton of sky shots from all different parts of the world, all different times of day. So I grabbed one with some nice detail and a reasonable close match to the time of day and overall color tones of this image. Close though it was, I decided to pick up some of the blue tones from the stones in the walkway with my Brush tool and paint that color into the blue of the sky at about 30-40% opacity. It’s a small detail, but one the eye does register:
Intensify!
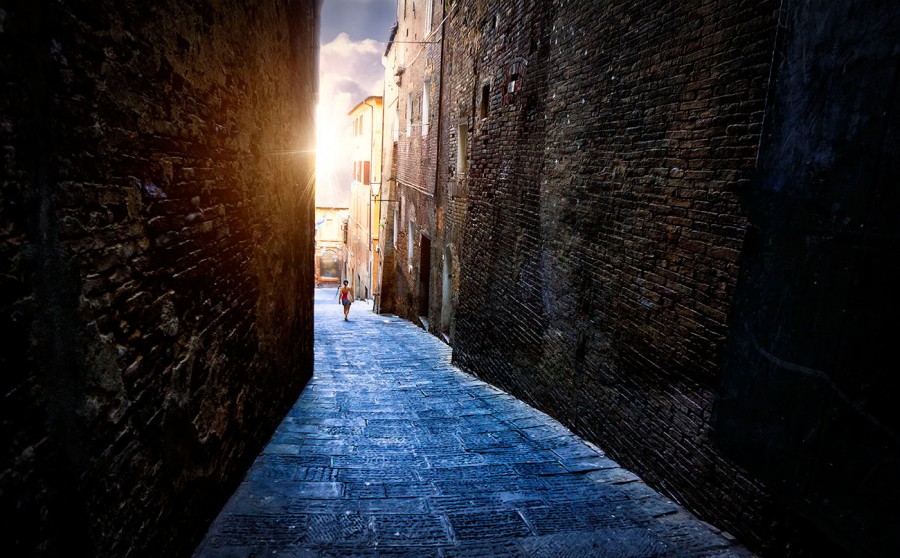
Next – and I knew what was coming after THIS step, so I wanted to prepare the image. I planned to add sunlight… so wanted to intensify the colors and texture and warm things up. I used a bit of Topaz Clarity and NIK Skylight to do it, and fine tuned that with NIK’s Viveza 2 in the center… adding a bit more warmth and structure.
Here Comes The Sun
Cool! So now… the sun. There WAS no actual sun in the original image – yet that glint of gold on the left edge of that wall suggested it was there somewhere! So heck, I’ll help a sun out… and simply add what it SHOULD have been doing, if it were any kind of self-respecting sun at all. Using Knoll Light Factory from Red Giant Software,
I added the sun/glow, flare spikes, and radiant golden tones spreading out from it. It created the impetus for the whole composition and warmed up the middle, just as I envisioned it. I wanted the flow of this image to move from cool, darker tones into lighter, warmer ones like an irresistible invitation, as the girl walked into the light. Even the buildings were colored this way, so it all made visual sense already. Right before I added the sun, I also toned down that stripe of bright blue on the left wall, near the top that had been bugging me. The sun took care of the rest.

Fine Tuning
Finally, some fine tuning. To my eye, the spread of the light should travel up the right wall further. I looked at how it fell to begin with… and decided it could very easily reach further and make sense. For my composition and story, I wanted the blend between cold/dark and warm/light to happen a little more gradually too – not just in the very center. I always try to look at how shadow and light naturally play together in the real world – and when manufacturing them in a piece like this, do my best to emulate that. So that’s what I did here:
And there you have it. A pretty simple processing, compared to some photos in my world! But fun to see how you CAN capture the basic bones in a capture… and bring all the colors, light and textures to life so it’s REALLY what you saw when you pressed the button!